Why Discord Voice With the Social SDK
Building voice chat from scratch is an incredibly difficult problem in games. Noise suppression, echo cancellation, and codec optimization are deep technical challenges. Discord has spent years battle-testing all of this infrastructure at scale. When you use the Discord Social SDK for voice, your game’s voice chat becomes powered by Discord. What your game needs to do is take the audio for each player and position it in 3D space. That’s where Unity comes in. By intercepting the audio that Discord would normally play through its default output, you can route it to per-playerAudioSource components in your Unity scene instead. Unity handles all the spatial math: volume falloff based on distance, stereo panning based on direction, and any additional audio effects you want to layer on.
The result is that players get Discord-quality voice that sounds like it’s coming from other players in the game world. No separate voice app needed. No complex audio networking code. Just Discord and Unity doing what each does best.
How It Works
Before diving into any code, it helps to understand the full architecture at a conceptual level. The proximity voice chat (spatial audio) pipeline has five stages.1. Players Join a Lobby
Everything starts with a lobby in the Discord Social SDK. When players connect to a multiplayer session, they also join a shared Discord lobby managed by the Social SDK. The lobby tracks who is in the session and provides the foundation for the voice call.2. Starting a Voice Call with Audio Callbacks
The Social SDK lets you start a voice call for a lobby, but here is the key difference from a normal voice call: instead of callingClient::StartCall and letting Discord handle playback through the user’s default audio device, you call Client::StartCallWithAudioCallbacks. This function intercepts the audio pipeline and gives you a callback that fires every time Discord has decoded audio ready for a player.
3. Intercepting the Audio
When Discord receives and decodes voice audio from a remote player, it calls the callback inClient::StartCallWithAudioCallbacks. The callback in this function hands you the raw PCM audio data along with the user ID of the speaker. It also gives you an outShouldMute flag. Setting this to true tells Discord not to play the audio through its normal output and allows you to control where it gets played.
4. Routing Audio to a GameObject
Instead of letting Discord play the audio, you route the raw audio stream (PCM data) to a per-playerAudioSource that lives on each player’s GameObject in your Unity scene. Each remote player has their own AudioSource positioned at their character’s location.
5. Unity Handles the Spatial Audio
With theAudioSource configured for full 3D spatial blending (spatialBlend = 1f), Unity automatically handles everything else. As players move around the scene, voices get louder when they are close, quieter when they are far, and pan left or right based on direction relative to the listener. Unity handles it all for you.
Prerequisites
Before starting with the implementation in this guide, you should have:- The Discord Social SDK integrated into a Unity project, with a working lobby that players can create and join. If you haven’t done this yet, follow the Unity getting started guide and the Managing Lobbies guide first.
- A multiplayer game where remote players can join and move around in 2D or 3D space. The specific networking library you use doesn’t matter as long as player spawning and movement is handled.
Players Join the Lobby
When a remote player joins the lobby, two things need to happen: your networking layer spawns their GameObject in the scene, and you register them in a dictionary that maps their Discord user ID to theirVoiceAudioSource component (defined later in this guide). This dictionary is what lets you send each player’s audio to the correct GameObject.
Declare the dictionary at the top of your class handling Social SDK callbacks:
Client::SetLobbyMemberAddedCallback to spawn the remote player and register them:
For the purpose of this guide, all of the player and voice setup is tied to a player joining a Social SDK lobby. In a production game you will likely tie your player’s lifecycle and voice to your own multiplayer session management system instead.
Setting Up the Voice Call
When a player joins a lobby, start a voice call usingClient::StartCallWithAudioCallbacks. Provide two callbacks: one for received audio (OnVoiceAudioReceived defined below), which you will use for spatial positioning, and one for outgoing audio, which you can leave empty since Discord handles microphone capture.
activeCall object you can use to configure voice settings.
Voice Activity Detection (VAD) is how Discord determines whether a player is speaking or silent. Audio below the threshold is suppressed rather than transmitted. Call::SetVADThreshold with a value of -80f sets a low threshold for voice detection (VAD). A low threshold like this allows players to whisper and still be heard. Tuning this value lower to -100f will allow all audio to come through but you may hear keyboard clicks and other noise. Raising it or removing this call will use a standard threshold set for regular volume speech.
Intercepting Audio Per Player
With the voice call active, Discord will fire yourOnVoiceAudioReceived callback every time it has decoded audio from a remote player. This is where you intercept Discord’s default playback and redirect audio to the correct AudioSource per player.
userId of the player’s audio which you use to pass the audio to the correct player object in your scene. data, samplesPerChannel, sampleRate, and channels, all define the raw audio data which you’ll send to an AudioSource. Setting outShouldMute = true is important: it tells Discord to skip playing this audio to the default audio device for the player. Instead, you look up that player’s VoiceAudioSource component from a dictionary keyed by user ID and feed the raw samples directly to it.
outShouldMute lets you choose whether Discord should play the audio through its normal output or not. Setting it to true stops it from playing out of the default device and gives you full control to route the audio yourself, which is necessary for proximity voice chat. If you set it to false, Discord will play the audio through your players’ default audio device. In a full game it would make sense to set this to false while players are in a lobby so they can talk to each other and then true once they’re playing the game.The VoiceAudioSource Component
TheVoiceAudioSource component is where Discord’s audio pipeline and Unity’s spatial audio system meet. It lives on each remote player’s GameObject alongside a Unity AudioSource, receives raw PCM audio from the Discord callback, buffers it in a thread-safe ring buffer, and feeds it to Unity’s audio engine through a streaming AudioClip.
- Awake creates a streaming
AudioClipthat Unity’s audio thread pulls samples from continuously. TheAudioSourceis configured withspatialBlend = 1ffor full 3D positioning, meaning Unity will apply distance-based volume attenuation and stereo panning based on where this GameObject is relative to theAudioListenerin the scene. - FeedSamples is called from
OnVoiceAudioReceivedwhich is hooked up toClient::StartCallWithAudioCallbacks. It takes the raw audio data from Discord, converts it to floating point, mixes multi-channel audio down to mono, and writes the samples into a ring buffer. Thelockensures thread safety between the Social SDK and Unity’s audio thread. - OnPCMRead is called by Unity’s audio thread whenever it needs more samples to play. It drains available samples from the ring buffer, or outputs silence if the buffer is empty (for example, when the player is not speaking).
The 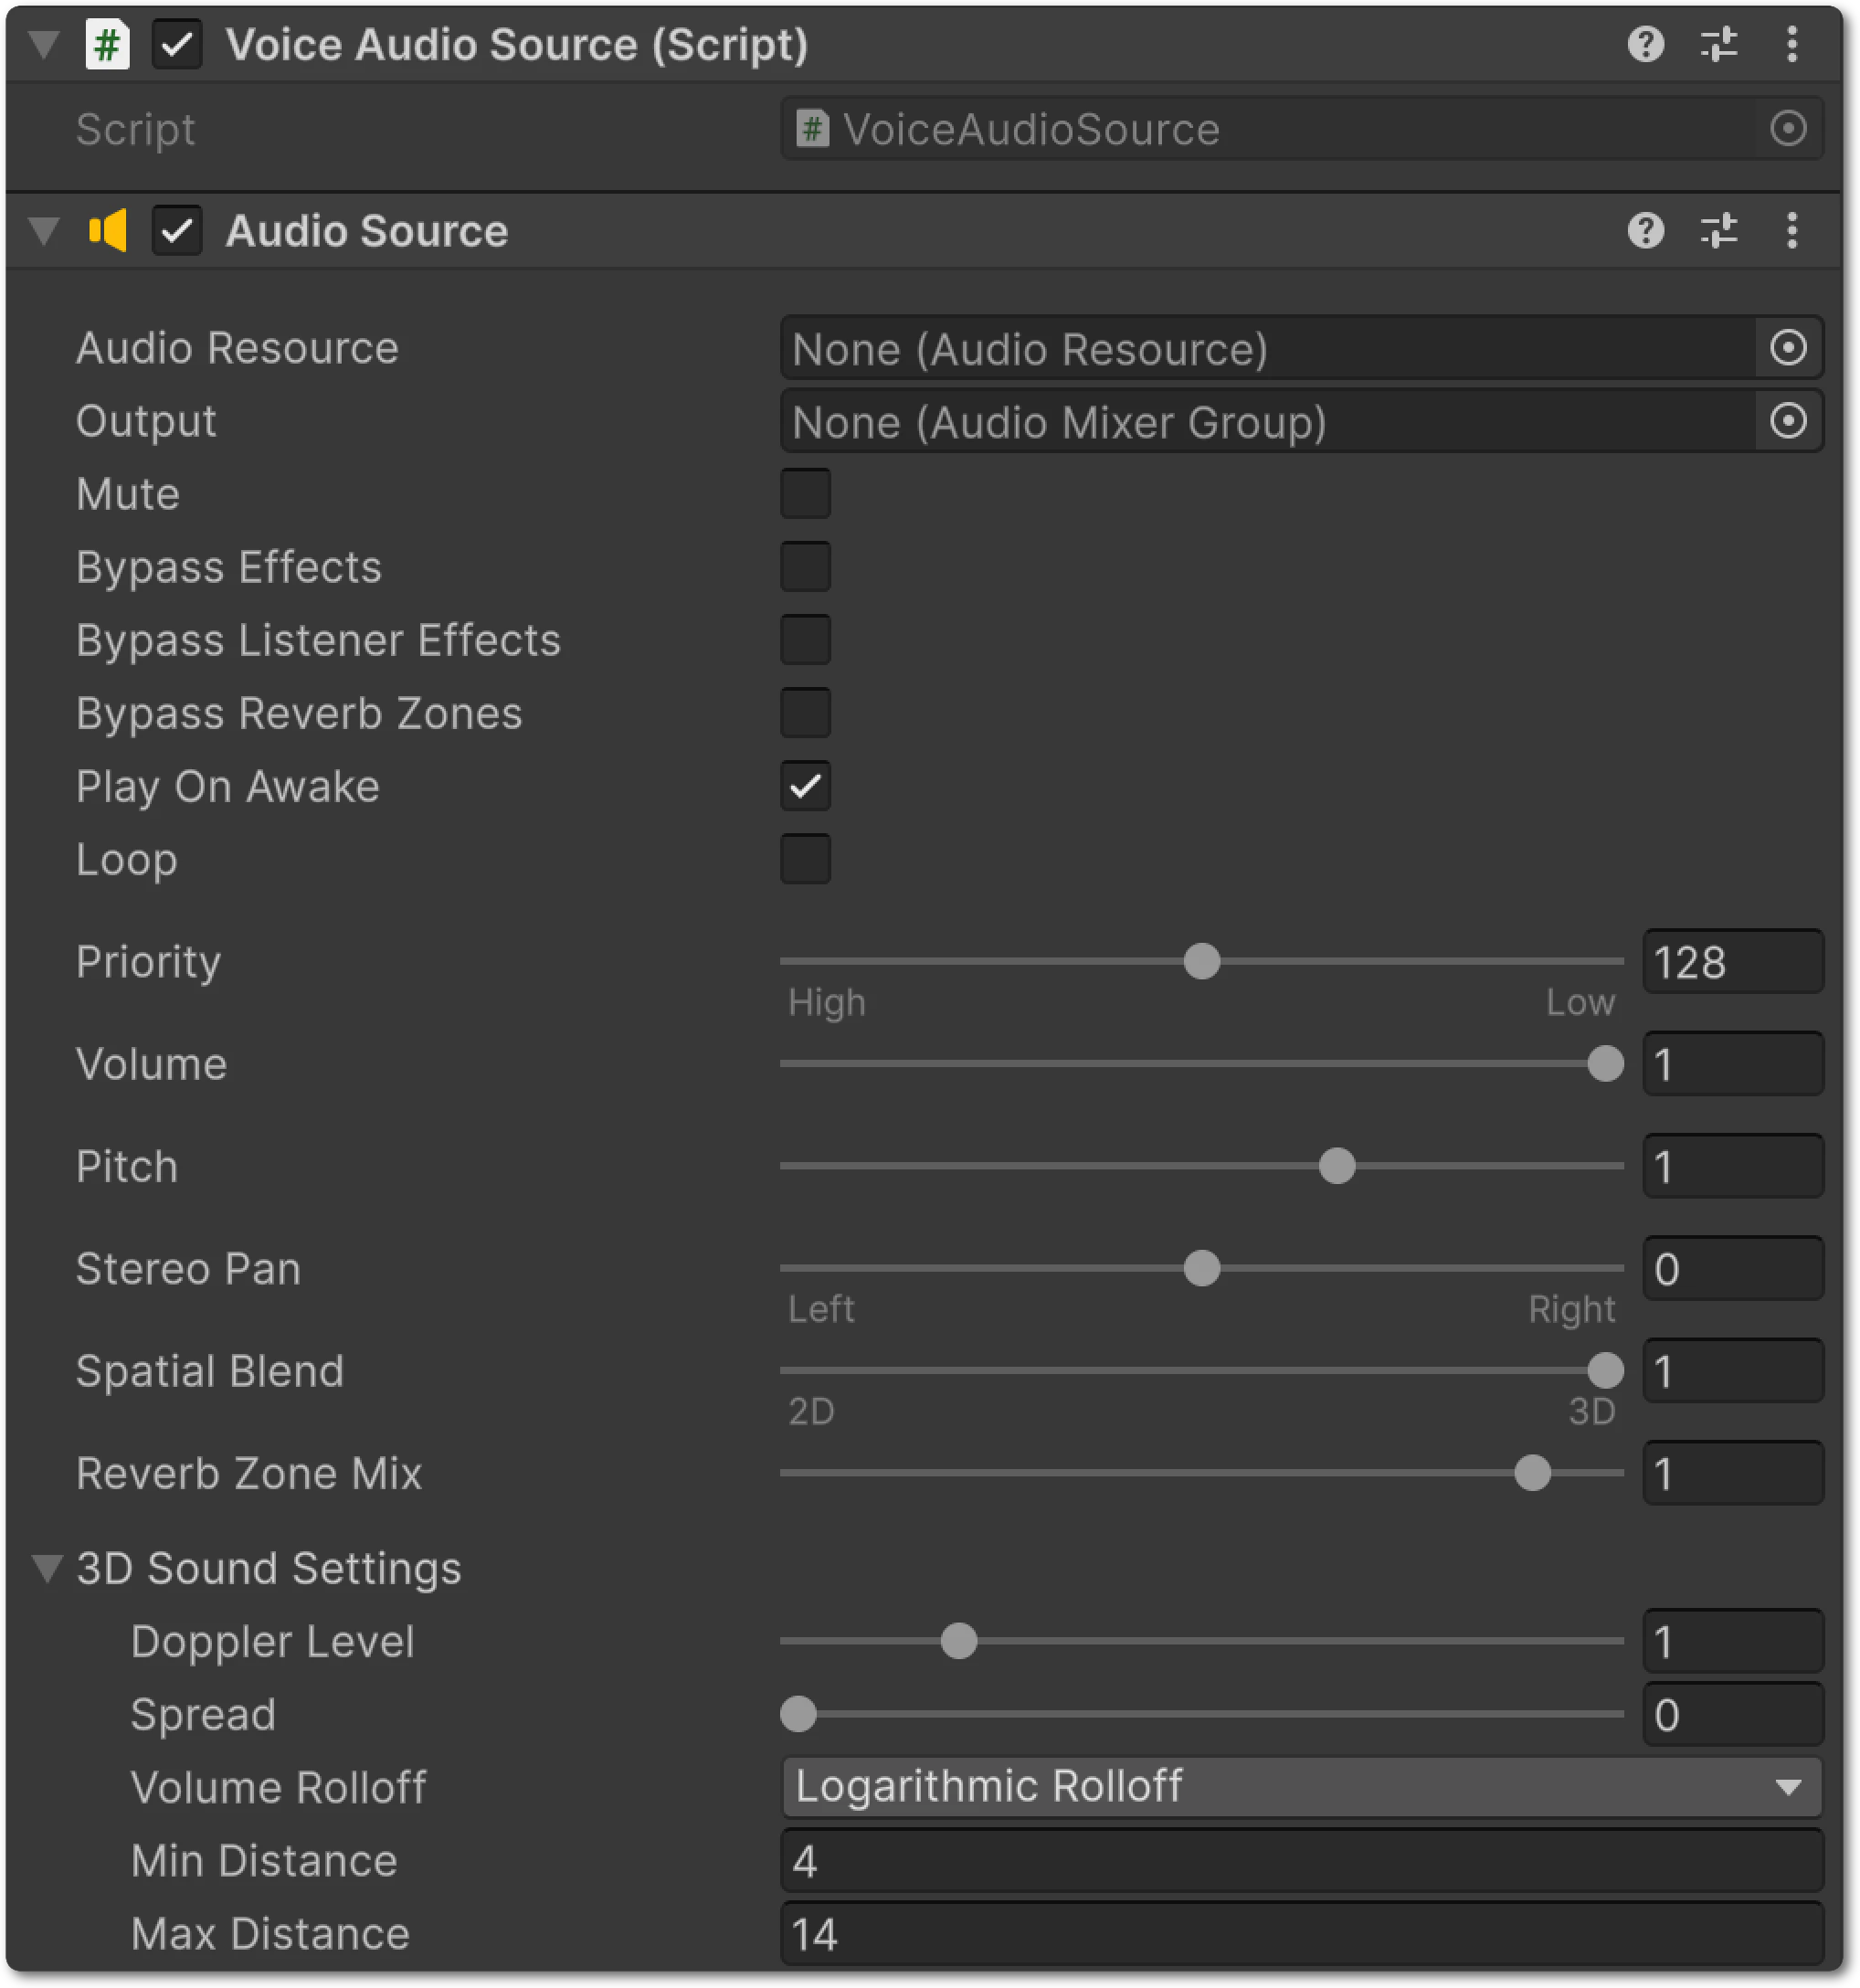
spatialBlend = 1f setting on the AudioSource is what makes the audio spatial. Unity handles all of the 3D math automatically based on the GameObject’s position relative to the AudioListener (typically on the camera or local player). You can further customize the spatial behavior by adjusting the AudioSource’s 3D Sound Settings in the Inspector, including min/max distance, rolloff curve, and spread.Putting It All Together
Here is the full architecture from start to finish:- A player joins a lobby and
Client::StartCallWithAudioCallbacksstarts the Discord voice call with your custom audio callback. - Decoded audio arrives for a remote player and the
OnVoiceAudioReceivedcallback fires. - Audio data is routed to that player’s
VoiceAudioSourcecomponent viaFeedSamples(). VoiceAudioSourcesends the audio into Unity’s audio system through its ring buffer and streamingAudioClip.- As players move around the scene, Unity automatically adjusts volume and stereo panning based on distance and direction.
VoiceAudioSource component bridges the two.
Now you have a working proximity voice solution combining the power of the Discord Social SDK and Unity’s 3D audio system. From here you can integrate this into an existing game, or create your own!