Why Build a Community?
Direct connection with your players. Unlike a social feed, a Discord server gives you direct communication with your players. Your announcements and message become entire threads where you can talk with your community members. Feedback that makes your game better. Early community members play your game while it’s still rough. They give feedback and report bugs. The earlier you build the community, the more development cycles benefit from their input. Re-engagement between updates. An active Discord community keeps your game in your players’ minds even when they’re not playing. Between game updates you can run giveaways and contests, bring your game’s world into the server through bots, and talk with the community about what’s coming. Players become advocates. When players feel invested in a community, they stick around and share it. Engaged players are one of your strongest supporters both in helping create momentum for your community and sharing your game.Community is a Conversation
When creating a community, a common pitfall is to treat it like another marketing platform. If you only interact to push information to your players you’ll miss out on all the benefits of having a vibrant community. You are the most core piece of your community and you need to be a part of it in order for it to succeed. A thriving community is one where members feel comfortable and have something to talk about with each other. If you give players something to discuss (builds, strategies, lore theories, balance changes) and facilitate conversation amongst them, you’re setting yourself up for success. Keeping all of this in mind will help you as you build your server and grow your community.Create Your Community Server
In order to start building a community you’ll need to start by creating a new Discord server. If you have an existing playtest or development server, you can modify it to become your community, especially if you’ve already got players in there!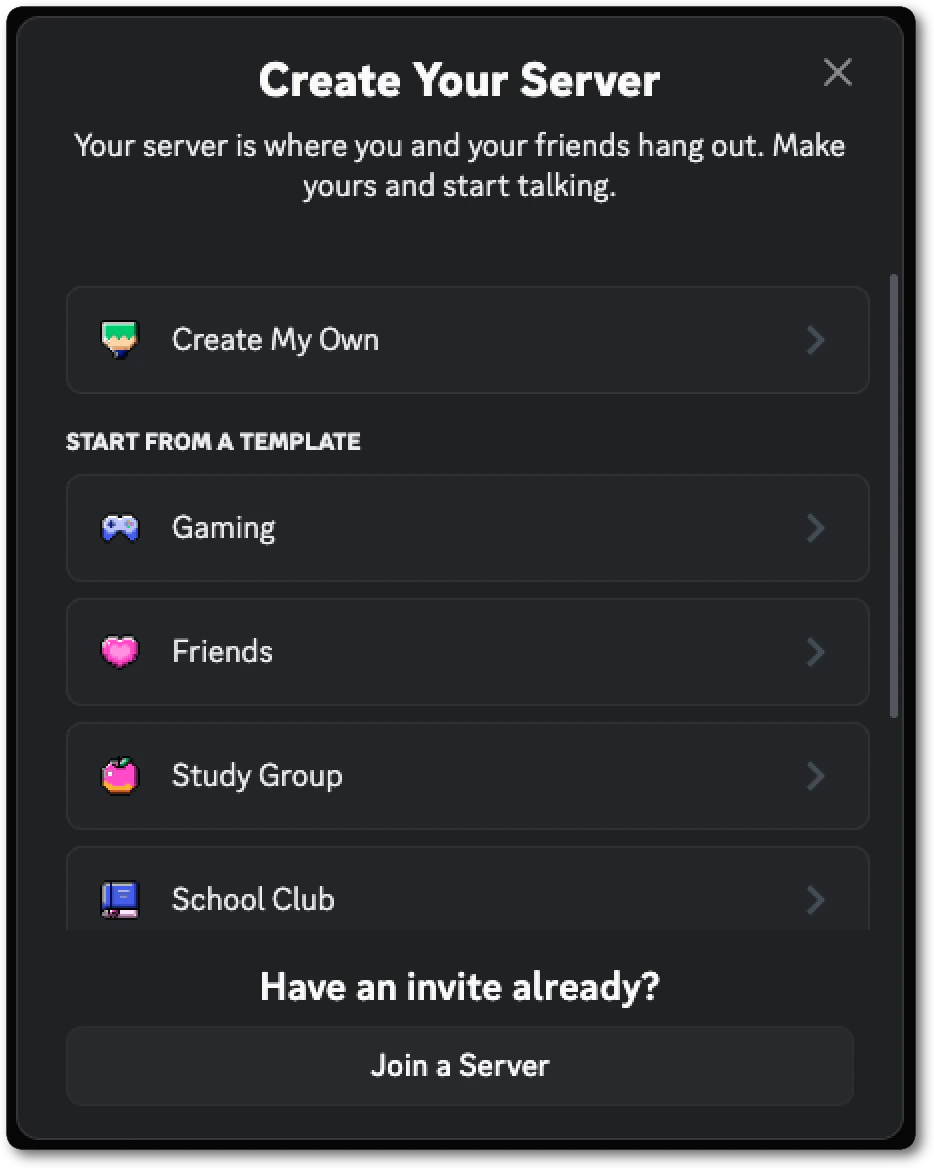
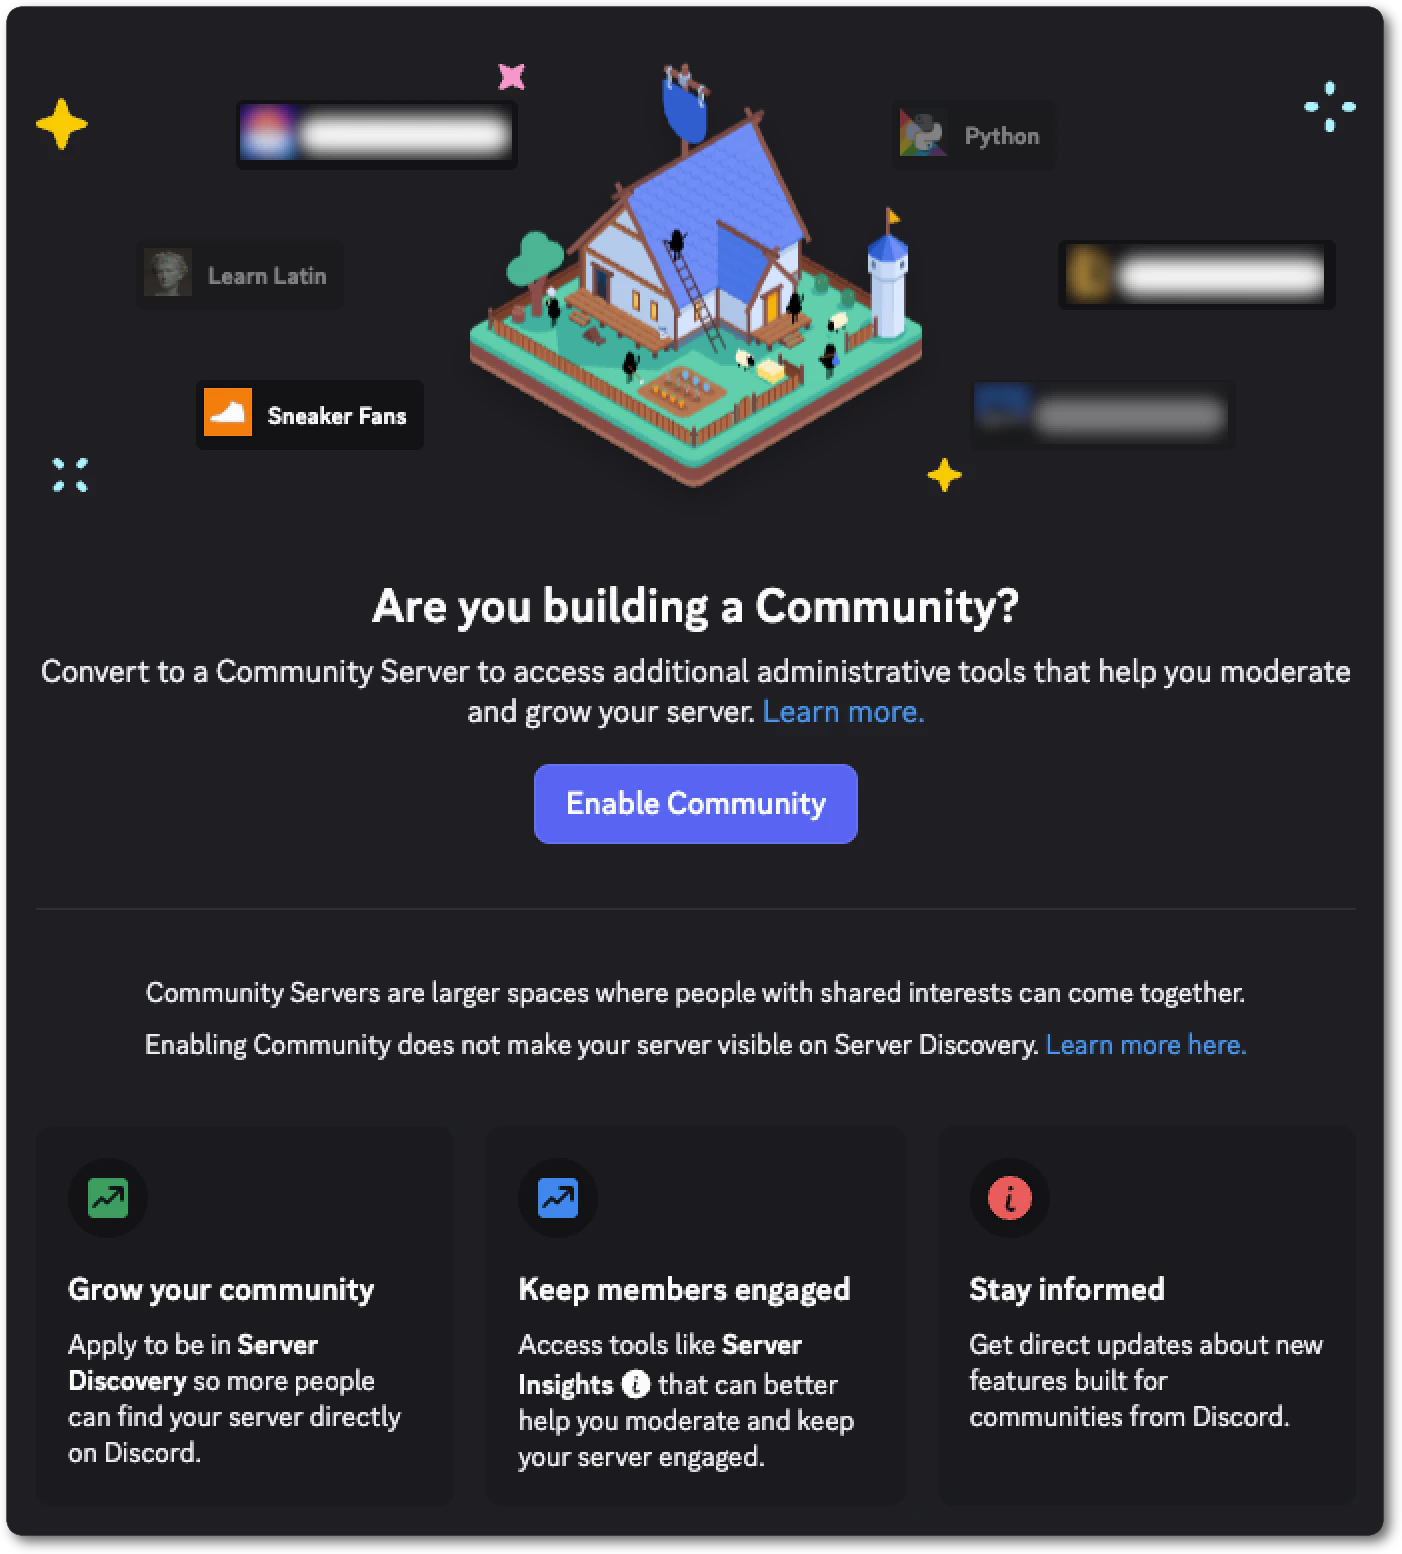
- Announcement Channels: A channel for publishing announcements directly to your community. Members can subscribe to these channels and get your server’s updates in their own servers. Read more about announcement channels here.
- Community Onboarding: Through an interactive onboarding, new members can assign their own roles and agree to rules. Read more about community onboarding here.
- Server Discoverability: With Community enabled, players can find and join your server through Discord’s discovery features. This is how your server shows up when players search for your game.
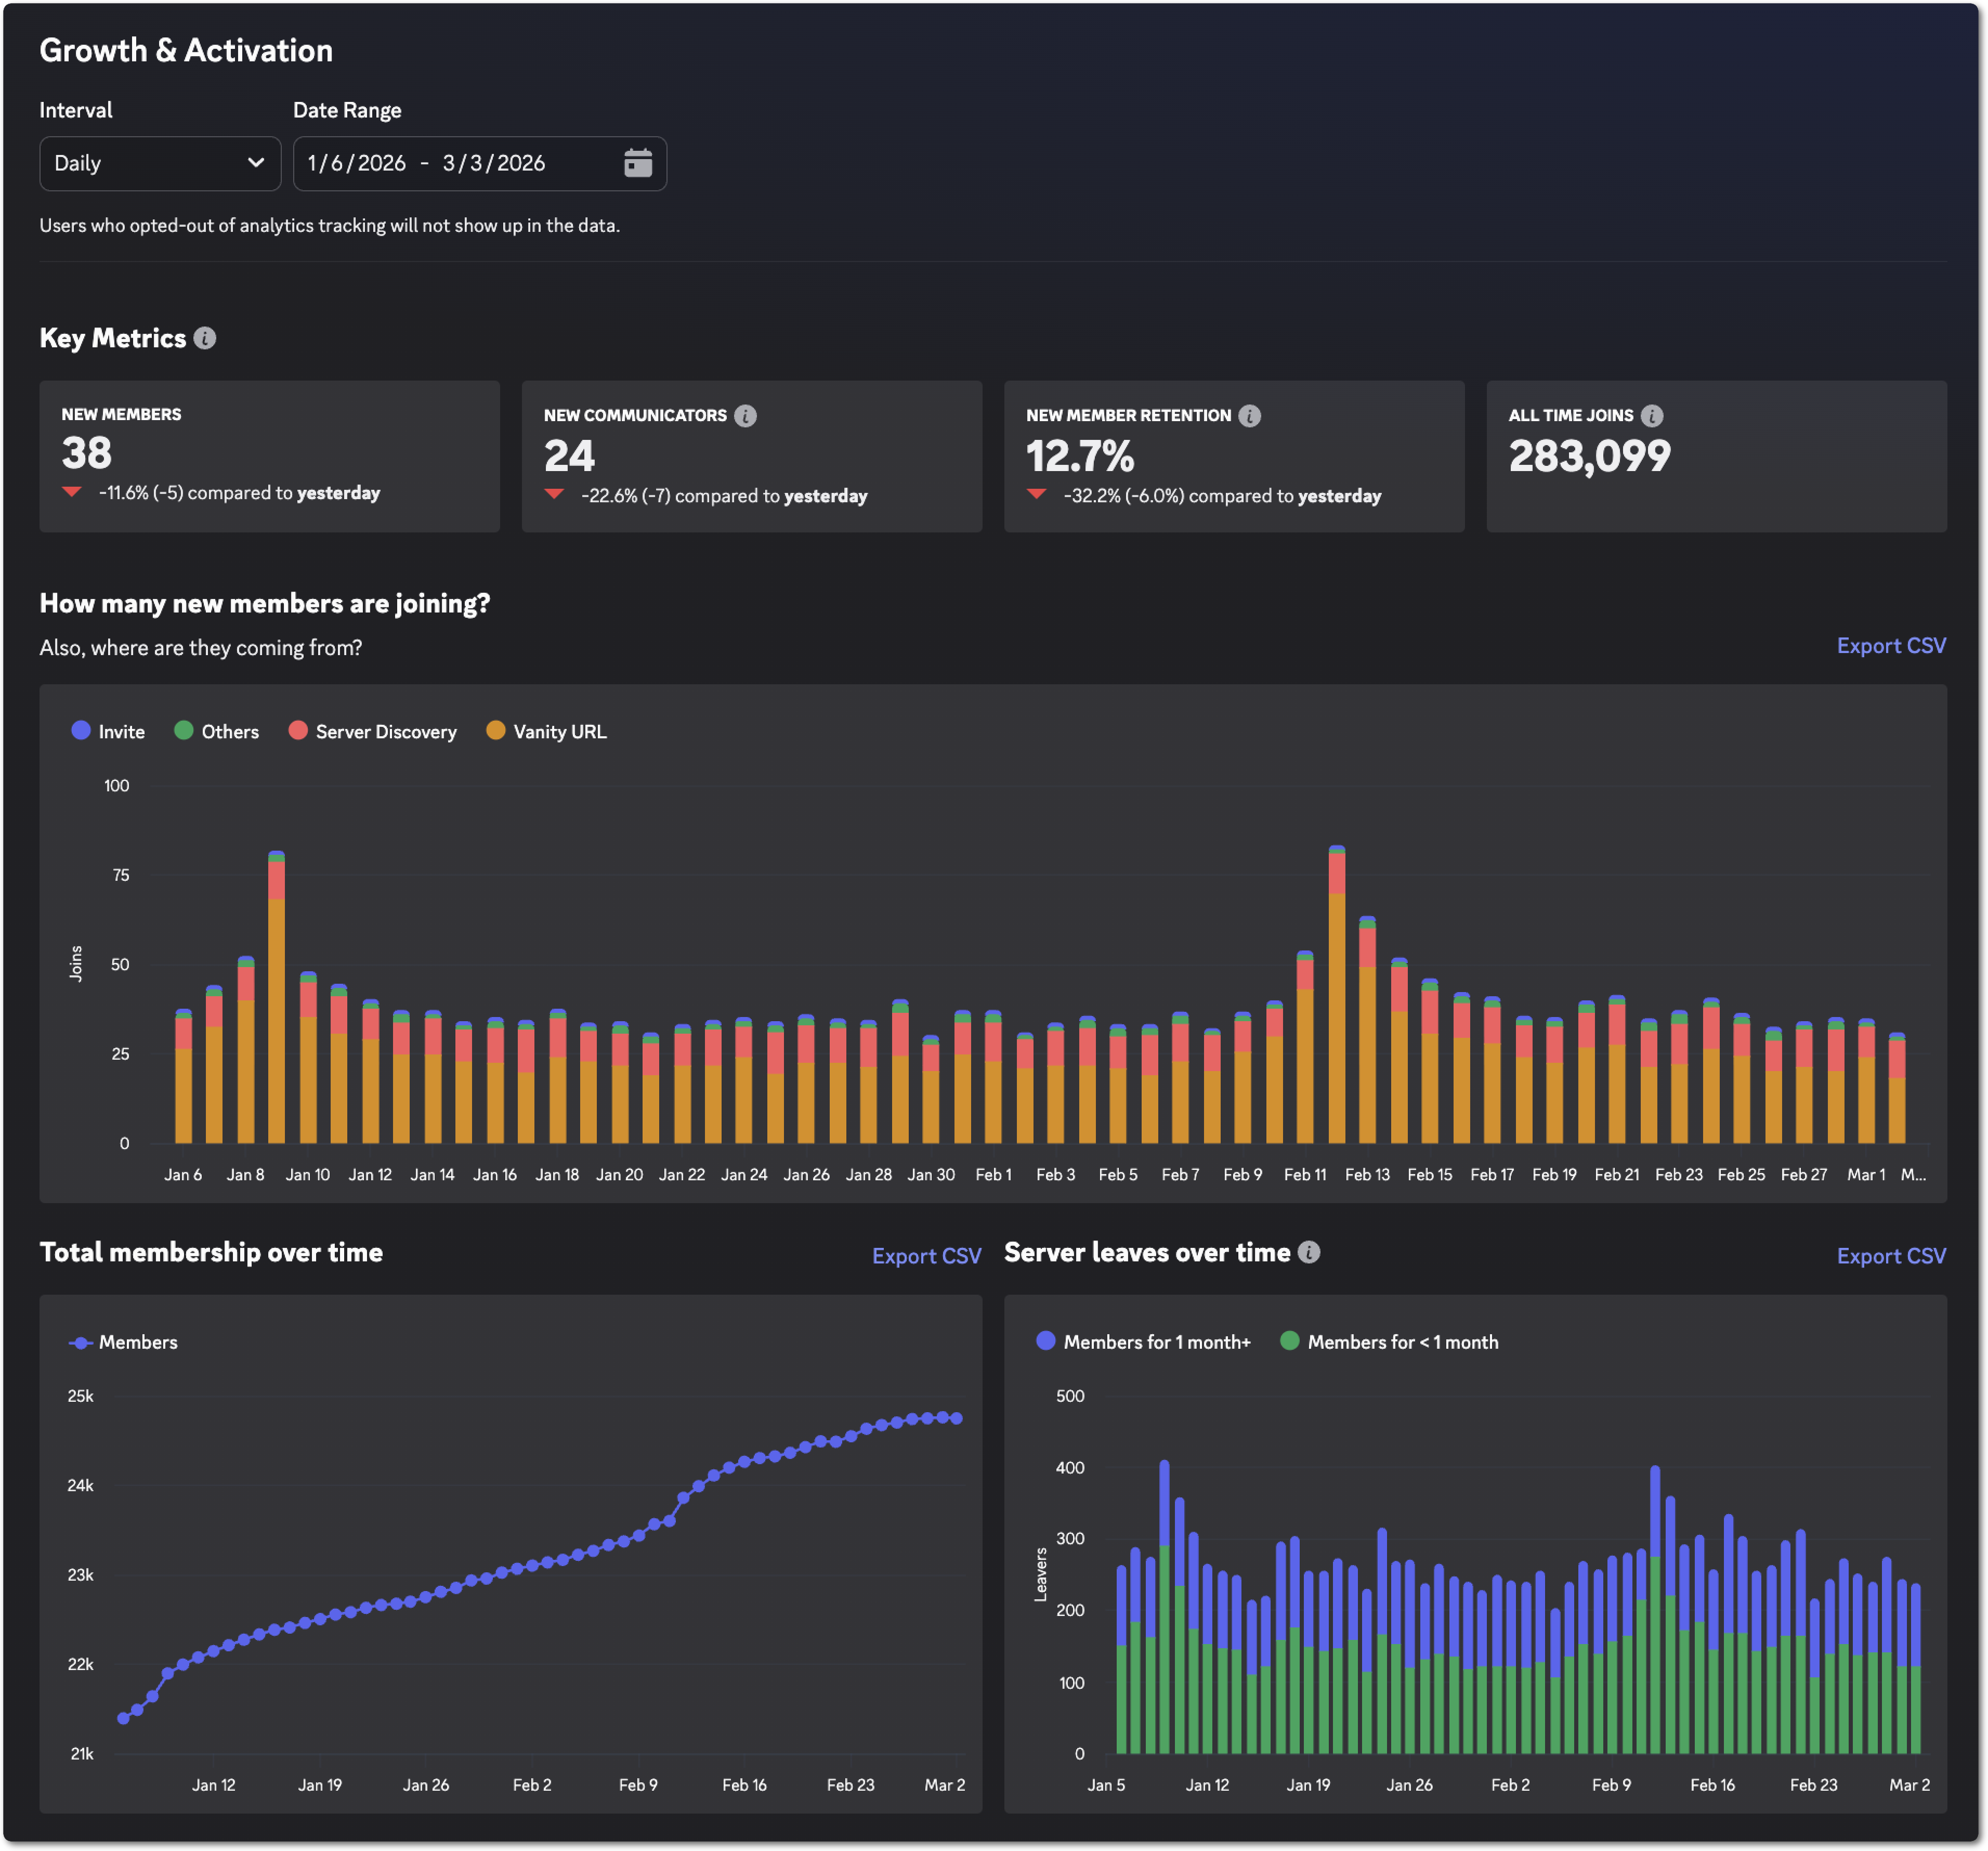
- Server Insights: Once 500 members join, you get detailed engagement and retention data like weekly communicators, what channels are most used, where people are coming from, and much more. Read more about server insights here.
Structure Your Channels
With your server created it’s time to think about what channels you’ll need to start your community. More channels does not always mean a better server, especially at the start. New members can get overwhelmed by a wall of empty channels, and this stays true no matter how big the community gets. Start with the essentials and add more only when the community actually needs them.Read-Only Channels
These channels are for you to post in. Members can read, but only admins can send messages.#rules-and-info: A read-only channel with your server’s rules and guidelines#announcements: The source for game updates, events, and news. Make this an Announcement channel type so members can subscribe to it into their own servers. Read more about announcement channels here.
Community Channels
These are two-way discussion spaces where members talk to you and to each other.#game-discussion: Where players talk about your game.#feedback: Use Discord’s Forum channel type here, not a regular text channel. Forum channels organize discussion into threads with tags, so you can label posts as “Under Review” or “Implemented”.#bug-reports: Also a Forum channel. Set up post guidelines to tell players to include steps to reproduce the issue, platform, and game version. This makes your bug intake dramatically more actionable than a stream of “Game crashed” or “Broken”.
Give your channels a topic by right clicking the channel then > Edit Channel > Channel Topic. This topic will display next to the channel’s name when it’s open, reminding players what is appropriate to talk about in that channel.
Admin and Developer Only Channels
Private channels that only your team can see.#dev-chat: Private channel for your team to coordinate.#admin-log: Logs from your moderators, AutoMod, and bots. Track bad actors, and log server changes with notes on why you made them.
Optional Channels
Wait until you see a need or the community asking for channels like these.#off-topic: Social channel for non-game conversation and memes. Gives members a reason to hang out beyond the game itself but also adds noise to the server.#lfgor#play-together: A way for players to find other groups or parties to play with in your game. Great for multiplayer games with teams.
Set Up Roles and Permissions
At a glance, roles tell your community who someone is. Behind the scenes, they control what members can do and where through permissions. Things like sending messages, using emoji, kicking other users, and much more are permissions you set specifically for a role. Your role structure reflects the shape of your community and gives members a sense of identity within it. Like channels, the goal is to start minimal and add more only as you need them.Important Roles
Start with a few core roles and add more only as they’re needed. It’s easier to add more roles than it is to take existing ones away.- Developer or Staff role: Visually distinguish your development team from players. When a developer responds, members need to know at a glance. This builds trust and signals active development. Give your studio a named role (
@[Your Studio] Devor@Developer). - Moderator role: If you plan to have moderators outside of your development team this role lets you delegate community management without giving away admin access. This is optional at the start but having a @Moderator role for dedicated moderators will be very helpful as your server grows. You may not want them to have certain permissions that your @Developer role does like being able to manage channels, manage the server, or create webhooks.
Optional Roles
Everyone that joins your server will have a default@everyone role. You don’t need a specific player role but you can have some fun with different types of roles for players.
- Team based roles: If your game has factions or teams you can let players choose their faction in onboarding and have their role and role color reflect that.
- Achievement based roles: You can give your players special roles for achieving something in the game or being helpful in the community. Recognition is huge for making community members feel special.
- Class based roles: Let your players choose their favorite class in onboarding or assign it through the API from your game. Their role can reflect who they are in your game.
With a nitro boosted community server you can get access to custom role icons that make it even easier to spot a developer or moderator at a glance.
How Permissions Work
Permissions control what members can do in your server and where. They operate at two levels: role-level (what a role can do across the whole server) and channel-level (what a role can do in a specific channel). Channel-level settings override role-level ones, which is what gives you precise control without needing a separate role for every scenario. When a member joins, they get the@everyone role by default, which covers the baseline of what any member can do. Members can have multiple roles and any roles you assign on top of the default role, like @Developer or @Moderator, layer additional permissions onto that foundation.
For most game community servers, you only need to touch a handful of permissions to get your setup right. Here’s how to think about it using the channels and roles from this guide:
#announcements(read-only): By default,@everyoneshould only be able to read and react. To post here, a member needs the@Developeror@Moderatorrole with “Send Messages” enabled as a channel-level override. This way the channel stays clean and authoritative without you having to change anything about how those roles work elsewhere in the server.#feedbackand#bug-reports(Forum channels):@everyoneshould be able to create posts and reply. You may want to restrict the ability to manage or delete threads to@Moderatorand above so your feedback intake stays organized.#dev-chatand#admin-log(private channels): These channels should not be visible to@everyoneat all. Set “View Channel” to off for@everyoneat the channel level, then explicitly grant it to@Developerand@Moderator. Members without those roles will not see the channel exists.
Set Up Onboarding
Discord’s Community Onboarding feature gives you control over what a new member sees as they join your server. New members go through a short interactive flow where they can agree to your rules, introduce themselves to the community, and choose roles that reflect who they are. A well designed onboarding flow does two things. It reduces drop-off by giving new members something to do the moment they arrive and it immediately makes them feel like they belong by introducing them to the server. Through onboarding they’ve chosen roles that represent their faction or class, and their server profile already reflects something about them before they’ve sent a single message.What to Include
- Rules and guidelines: Members must acknowledge your rules before they can participate. Keep them short and direct so players can remember them easily.
- Role selection: This is where the optional roles you set up earlier pay off. Let players choose their faction, their favorite class, or their play style. These choices show up as their role in the server and give them an immediate identity in the community.
- Channel recommendations: Onboarding lets you surface the channels most relevant to each member based on the roles they chose. A player who selected a PvP-focused role can be pointed straight to your PvP discussion channel rather than having to find it themselves.
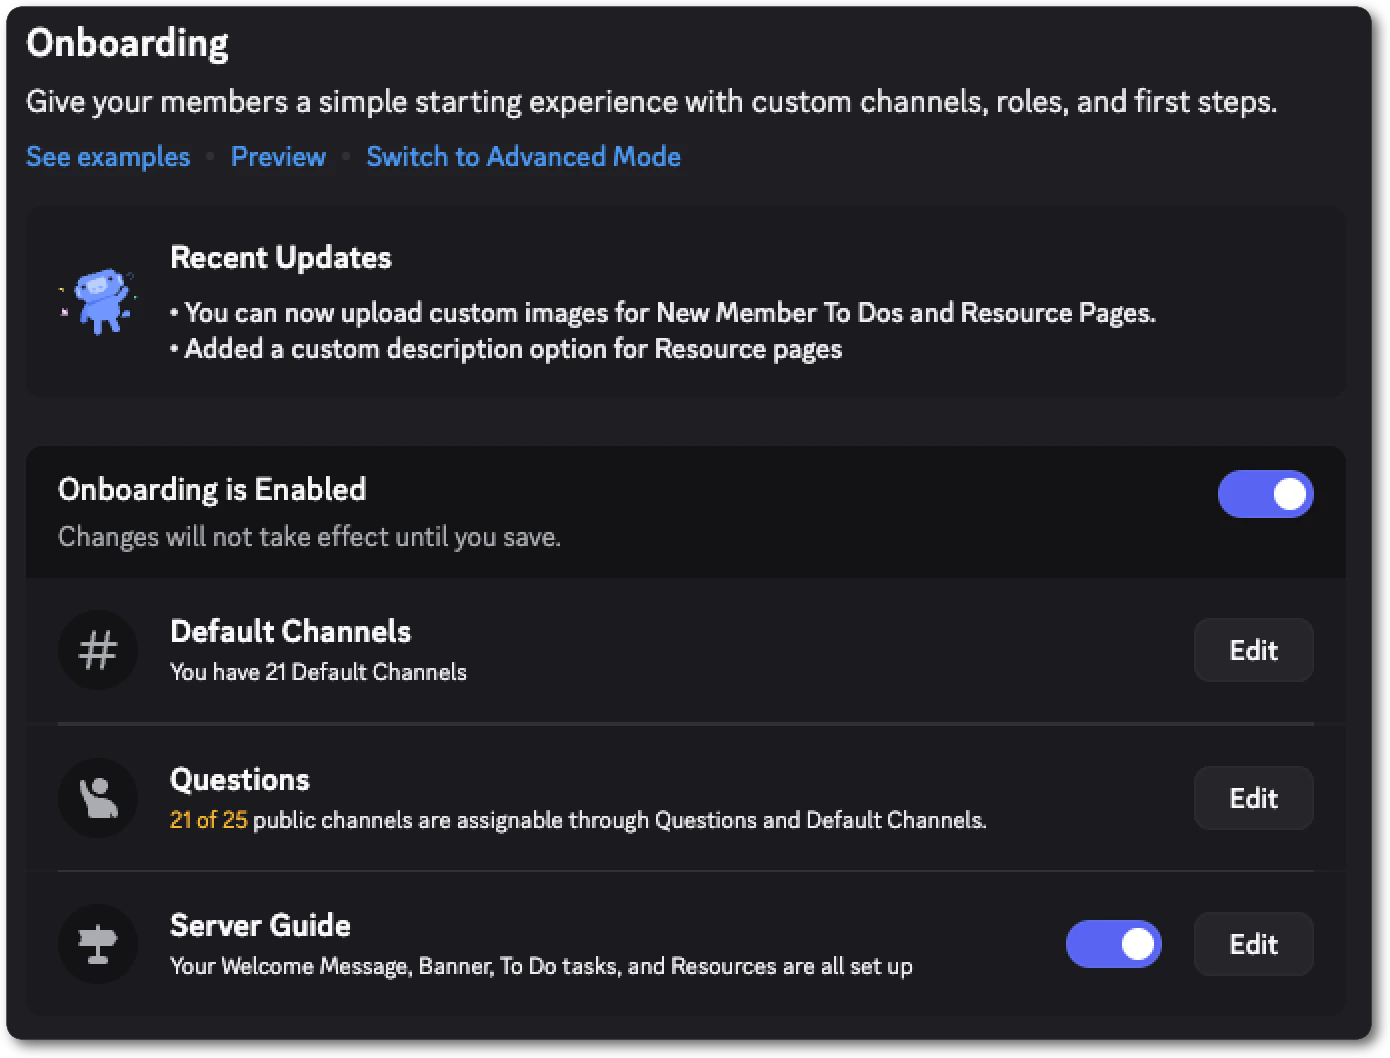
You can preview what your onboarding looks like to a new player by going to Server Settings > Onboarding and selecting Preview.
Moderation and AutoMod
Moderation is about protecting the community you’re building. A server that gets hit by spam, scams, or a raid can get annoying fast. Once your community gets a reputation for being poorly moderated, it’s hard to bounce back. The good news is that Discord gives you tools to handle most of it automatically, and the setup you do now will handle the majority of problems before they reach a human.- Set your verification level: Require a verified email or phone number before new members can participate. This requires members to have a verified account before they can chat which dramatically reduces spam bot accounts. Find this under Server Settings > Safety Setup > DM and Spam Protection.
- Enable AutoMod: AutoMod is Discord’s built-in rule engine that runs before any human sees a message. Set up rules to block spam, slurs, and known scams. Configure it to post alerts to your
#admin-logchannel so your team can review incidents. Read more about setting up AutoMod here. - Raid Protection and CAPTCHA: Automatically detect raids with the settings in Server Settings > Safety Setup > Raid Protection and CAPTCHA. When a raid is detected, Discord can automatically require new joiners to complete a CAPTCHA and restrict posting until the situation is controlled. This buys your moderation team time to respond without the server descending into chaos first.
- Update Permissions: Make sure 2FA is on for moderator actions and that
@everyonedoesn’t have any risky permissions set in Server Settings > Safety Setup > Permissions
Moderation Philosophy
When it comes to moderating, it’s worth deciding how you want to handle bad actors as a team.- Warn or ban? For most violations, a warning or a timeout gives genuine members a chance to correct behavior. Reserve immediate bans for obvious bad actors like spammers, users posting disturbing content, or anyone who joins with clear intent to disrupt the community.
- Who can take what action? Your
@Developerrole should be able to timeout and kick. Reserve permanent bans for@Moderatorwho are in the server more frequently. This prevents accidental escalation and gives you a review layer for permanent actions. - Where do you log decisions? Your
#admin-logchannel should be the record of every moderation action and why it was taken. When a member asks why they were banned, or a moderator is unsure if something was already handled, that log is your source of truth.
Claim Your Game
Claiming your game in the Discord Developer Portal links your Discord server to your game’s official profile across the platform. Without it, players searching for your game’s community on Discord may land on an unofficial or fan-run server instead of yours. Claiming makes yours the authoritative one: verified, discoverable, and visually distinct from everything else.What You Unlock by Claiming
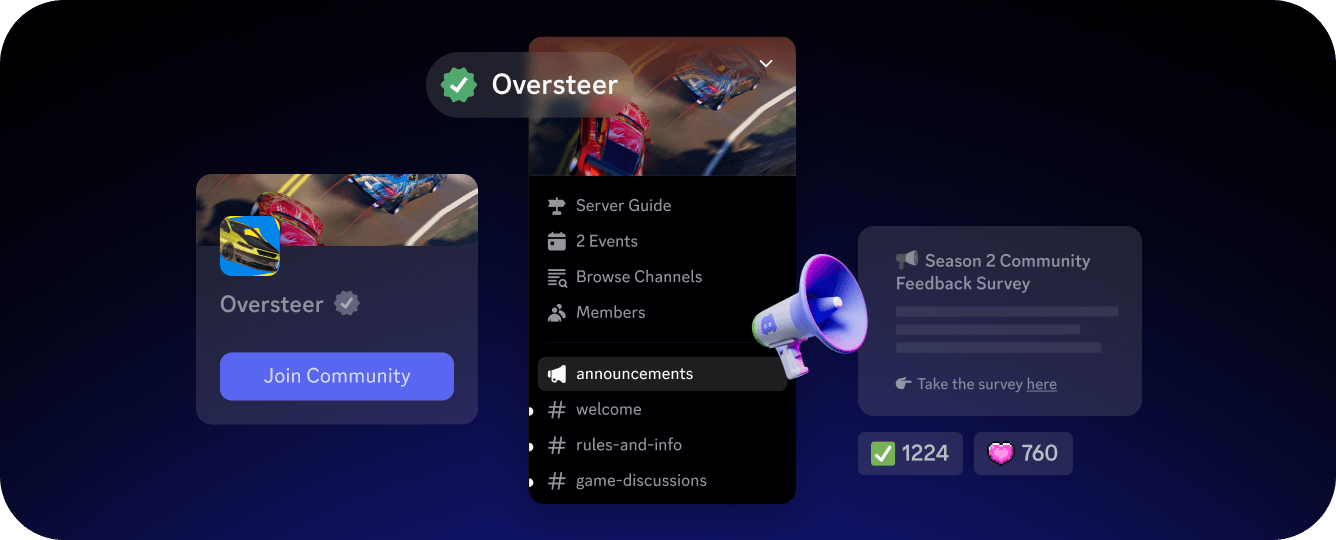
- Server Verification: Your server gets an official verification checkmark, standing out above community-run servers.
- Vanity URL: Create a custom invite link that is easy to remember and share (
discord.gg/yourgameinstead of a random string). This is the permanent link you’ll put in your game, your store page, and your marketing. - Server Discovery: Your server becomes visible to players searching for your game on Discord. It shows up first in the list of servers, above the unofficial ones.
- Customized Splash Screen: Create custom splash screens that you can use to showcase your game when players join your community.
- Game Identity: Control how your game profile looks on Discord. You can edit your game’s title, description, tags, visual assets, and links to your store page and socials.
Requirements
Before you can claim your game, you need the following in place:- Your game must be on Steam
- Your game’s Steam store page must include a link to your Discord community server
- Your game must be available to download and play
- You must have a Discord Team created in the Developer Portal
- The owner of your Discord server must be added to the team
How to Claim Your Game
For the full walkthrough of the claiming process, see Claim Your Game.Community Invites
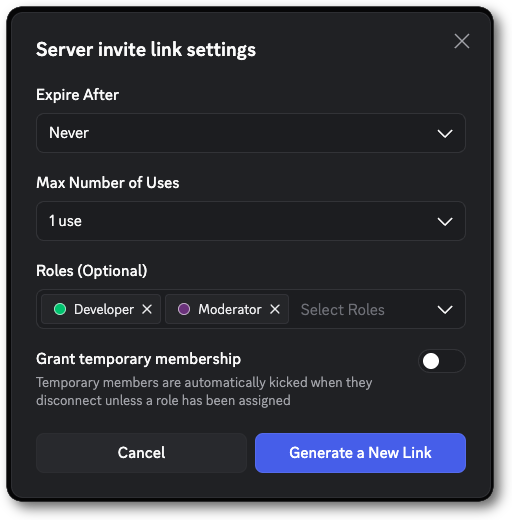
Community Invites are powerful server invites that can automatically assign roles to members when they join or restrict who can see and accept an invite.- Role assignment: Automatically gives a member one or more roles the moment they accept an invite. You can create these directly in Discord’s UI without any code, or generate them programmatically through the API. Either way, the role sticks even after the invite expires and a user can get the roles even if they’re already in your server.
- Targeted invites: Lets you upload a list of specific Discord user IDs. Only those users can see and accept the invite. This lets you control exactly who gets in, rather than anyone with the link.
What You Can Do With Them
Early supporter recognition. Create an invite for your beta or early access players that automatically assigns a@Beta Tester role. Players who join during this period carry that status permanently, which gives early supporters something visible and meaningful that later players can’t get.
In-game achievement roles. A player who 100%s your game can receive an invite from within the game itself that grants them a @Completionist role.
Subscriber and supporter access. Combine both features for paying subscribers. Generate a targeted invite restricted to their Discord user IDs that also assigns a @Supporter role. That role can unlock private channels that regular players can’t see.
For the full implementation guide, see Using Community Invites.
Bring Players to Your Community
With your community set up, it’s time to get players into the server. Here are a few ways to help players find and join your community.Create a Permanent, Non-Expiring Invite Link
This is the single most important step. Every link you put in your game, store page, or video description will break if the invite expires. If you have claimed your game or have enough server boosts from nitro you get access to a custom vanity URL that you can use instead of an invite (discord.gg/yourgame)
Put It in Your Game
The game itself is your best acquisition channel. These are players who are already engaged. The friction between “I’m playing this game” and “I’m in the community” should be as close to zero as possible. Place your invite link at:- Your game’s title screen or main menu
- At the end of the credits
- A contextual moment inside the game
Add It to Every Marketing Surface
Your Discord link should be as easy to find as your store page link. Anywhere a player might discover your game is an opportunity to bring them into the community:- Steam, Epic, or App Store page description or URL
- Social media bios and video descriptions
- Trailers and devlogs
- Press kits
- Streams and video content
Rich Presence Buttons
If you’ve implemented the Discord Social SDK, your Rich Presence can include a “Join the Community” button visible to all of a player’s Discord friends while they’re in your game. This makes every player a passive advocate for your server to their entire social graph.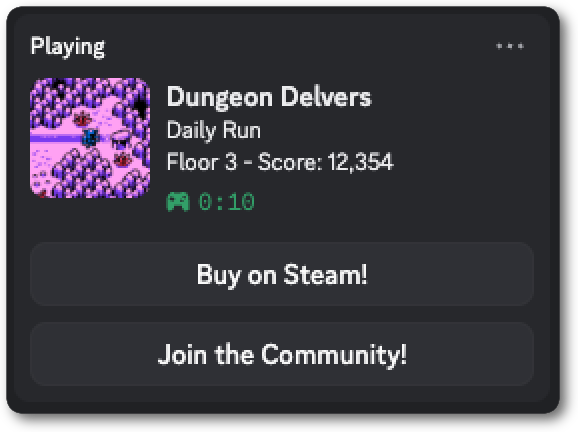
Community Events
Events give members a reason to show up and participate in a server at a specific time. It’s a great way to interact live with your community and to connect them back to the developers. Discord’s Events feature lets you create and publish events directly in your server. Members can RSVP, get a reminder when it starts, and see the event in the server’s event list.Types of Events
- Developer AMAs: Jump into a voice or stage channel with your developers and answer questions from the community. These don’t need to be long or highly produced. Even a thirty minute session where developers answer questions is exciting enough to draw players in. Having a community manager or moderator on hand to keep an eye on chat and surface any live questions makes it even easier.
- Community game nights: For multiplayer games, a scheduled session where the dev team plays with community members is a powerful engagement moment. The community will get to play along or try to beat the developers at their own game.
- Patch preview discussions: Before a major update drops, run a voice or stage event where you walk through what’s coming and take live questions. Turning an announcement into a conversation keeps members engaged with your development process.
- Playtests and beta access windows: If you’re testing a new build or feature, announce it as an event. Show off some of the new features to build excitement and then open up access to everyone watching.
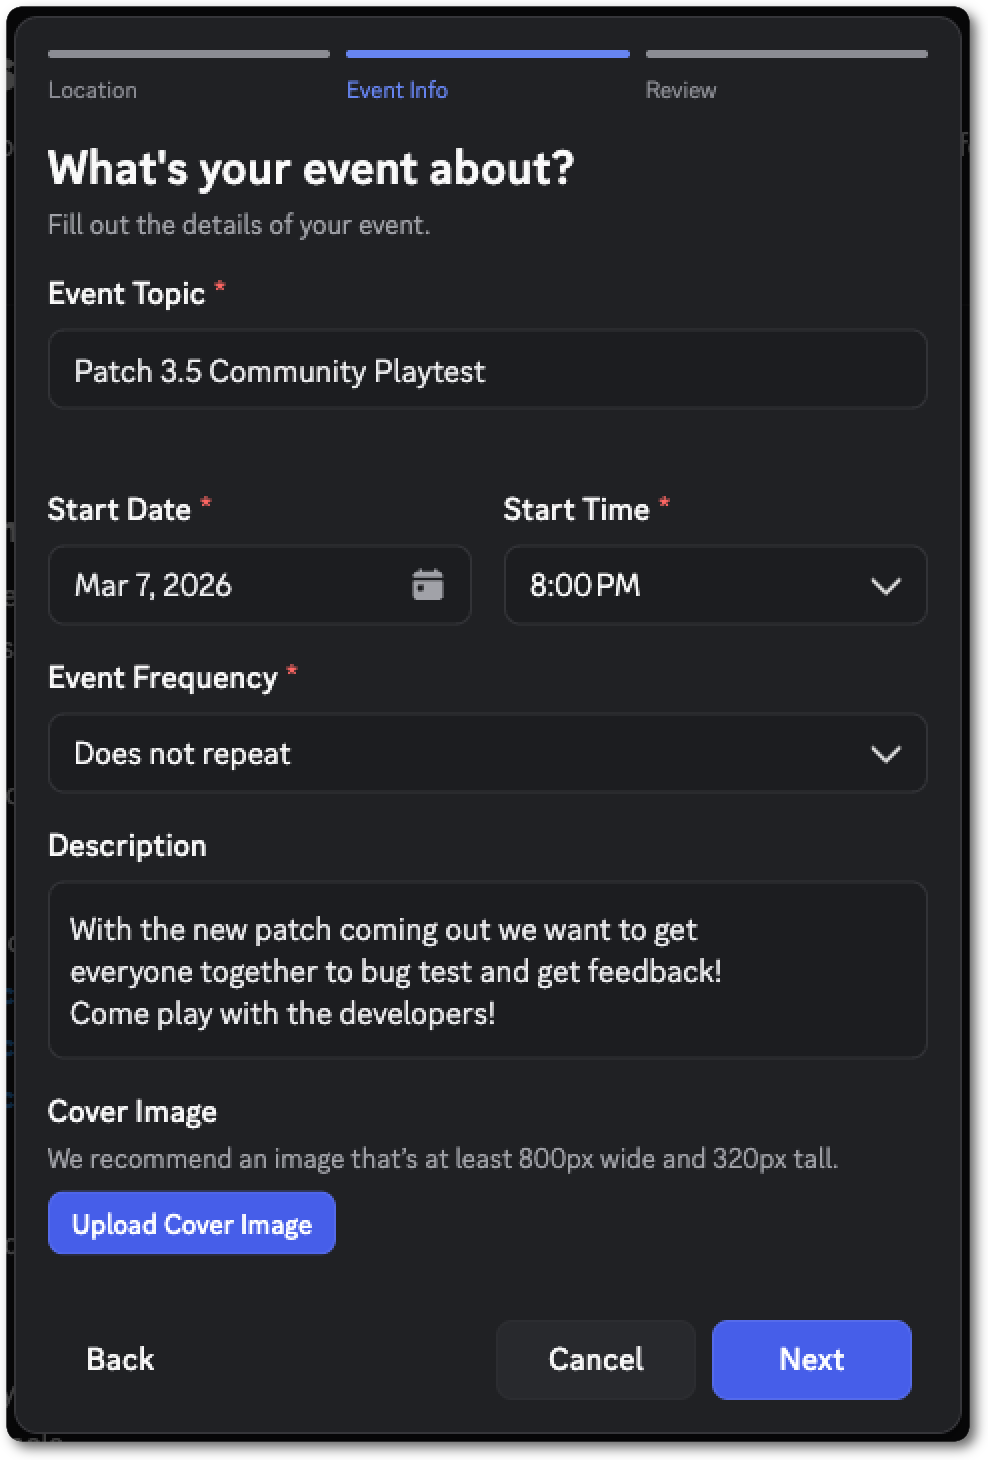
How to Create a Scheduled Event
Click the Events tab at the top of your server and then Create Event. You can set the event in a stage channel, a voice channel, or at an external link if you’re streaming somewhere else. Set a start time, title, write a short description, and publish it. Members will see it in the server and can choose to be notified when it begins. Use your#announcements channel to broadcast that you created an event and tag relevant roles that might be interested in it for better visibility.
Best Practices for a Healthy Community
The difference between a community that thrives and one that quietly fades comes down to ongoing habits. Here are some best practices to keep in mind as your community grows.Do
- Be present as developers. Even brief, genuine responses matter enormously. One developer reply per day shows the devs care more than a monthly wall of text. Players need to see that real humans are here.
- Make announcements interactive: When you share news, open a thread and allow players to react with emoji. Talk with them in the thread to see what they’re excited about. This is a great way to get feedback immediately for new features.
- Close the feedback loop: When a player’s suggestion or bug report leads to something, tell them publicly. “We fixed the issue @Username reported and shipped in v1.2.” This is a powerful way to give recognition to players and encourage them to participate.
- Promote your Discord community everywhere: It’s easy to add your server invite in every new piece of content you create. Make sure interested players have a place to go.
Don’t
- Just re-post from other platforms: Your Discord audience deserves content made for them. Discord is interactive so add context, start a thread, ask a question, and respond to players when you post updates. Make Discord worth coming to for something they cannot get elsewhere.
- Let weeks go without any activity: Post-launch silence is how communities fade. If you are heads-down on the next update, a brief “working on X, more soon” or a screenshot in
#announcementschannel is enough to keep your game feeling alive. - Expect community managers to do all the work: Managers and moderators are essential, but they are not a replacement for developer presence. An official server should feel like the developers are there listening and interacting with their players.
Lean Into Memes and Shareable Content
The most memorable communities develop their own culture, inside jokes, shared references, and memes. This can’t be created artificially, your players need to latch onto something in your game that resonates with them and then build on it. Your role is to recognize when they’re having fun and help amplify it. Don’t attempt to force trendy memes into your community. Pay attention to the language, reactions, and jokes your players are creating and have fun with it.Custom Emojis and Stickers
Custom emoji and stickers are how your community builds a visual language unique to your game. Players carry them across Discord expanding your game’s culture into every server they share them in. When populating your emoji and sticker slots, consider:- In-game characters and icons: A character that shows up at the worst time, a rough status effect, or the comedic relief of the party.
- Community moments: A recurring joke in your server, a big community moment, or even a release flop can all be turned into a sharable visual. Poking fun at yourself can also ease community unrest towards a situation like server issues.
- Fan-submitted designs: Did a player create a funny reaction or piece of fan art? Turning it into a sticker may get other players to make art and creates a feeling of recognition for the original creator.
Soundboards
Soundboards let members play short audio clips audible to everyone in a voice channel. They’re a fun way to bring inside jokes to your voice calls if your community has active voice channels. Consider adding:- Sound effects from your game: An explosion, game over sound, or level complete jingle can be a fun way for players to add humor to their calls.
- Character voice lines: A character’s catchphrase, a funny line of dialogue taken out of context, or a badly voice acted line are all great options for a memorable audio clip.
- Recognizing community: If a streamer or server regular has a running audio joke, adding it to the soundboard with their permission is a great way to recognize them.
A Bridge Between Your Game and Discord
Your server and your game don’t have to exist independent of each other. Using a Discord bot, you can connect your game and Discord community together giving you the ability to:- Run giveaways and rewards in your community that give skins and items back in the game
- Create leaderboards that are friend or server specific
- Automatically assign Discord roles based on in-game achievements (100% Complete in the game becomes a
@completionistrole in the server) - Create exclusive channels for players who reach certain milestones
Next Steps
Now that your server is live, configured, and ready for players, here are some helpful next steps:Using Community Invites
Deep dive on Community Invites with full implementation details